
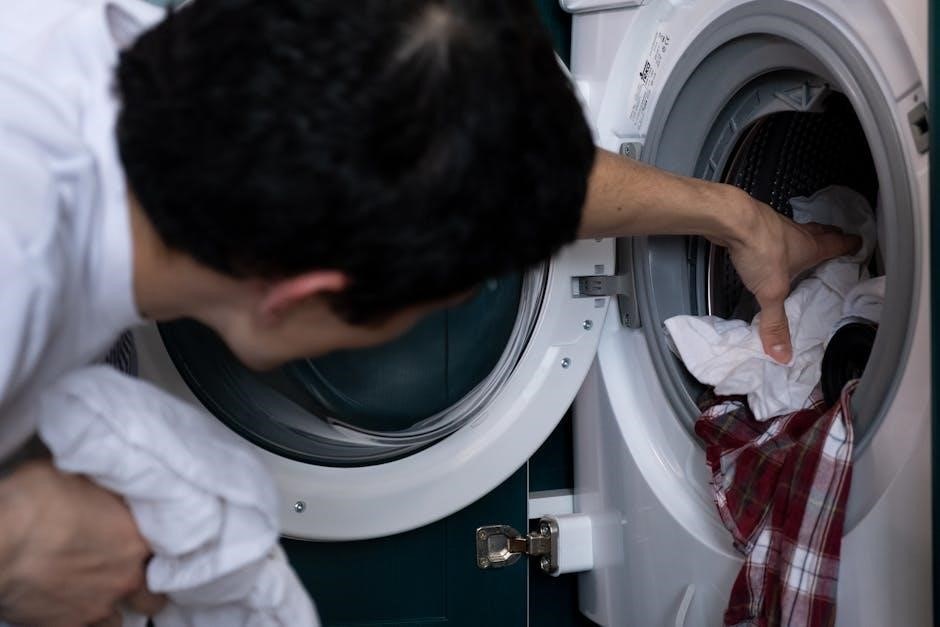
GE Washing Machine Troubleshooting Manuals: A Comprehensive Guide
GE washing machine manuals offer solutions for common issues like fill, drain, and unbalanced loads․ Error codes, such as E1, E2, and E3, pinpoint problems․
Understanding GE Washer Error Codes
GE washing machines utilize a sophisticated error code system to diagnose internal malfunctions, simplifying the troubleshooting process for both users and technicians․ These codes, displayed on the machine’s control panel, act as digital clues, indicating specific components or systems experiencing issues․ Common codes include E1, signaling a fill problem – the washer cannot properly intake water, potentially due to a closed valve or supply issue․
E2 indicates a drain problem, meaning the washer is unable to expel water, often caused by a clogged drain pump or hose․ An E3 error signifies an unbalanced load, prompting users to redistribute clothes within the drum․ The E31 code specifically points to a slow drain, suggesting a blockage in the drain trap․ Furthermore, a 353 fault code typically indicates a clogged lint filter, often due to fabric softener residue․
Understanding these codes is the first step towards effective repair, allowing for targeted inspection and resolution of the underlying problem; Referencing the GE washer manual, or online resources, provides detailed explanations for each code and recommended solutions․
Common GE Washer Problems & Solutions
GE washers, while reliable, can experience recurring issues․ A frequent problem involves inadequate filling, often stemming from a restricted water supply or a faulty water inlet valve․ Checking the hoses for kinks and ensuring the water supply is fully open are initial steps․ Another common issue is drainage failure, typically caused by a clogged drain pump or a blocked drain hose – cleaning these components often resolves the problem․
Excessive vibration is another frequent complaint, usually indicating an unbalanced load․ Redistributing the laundry within the drum can mitigate this․ Furthermore, lid switch malfunctions can prevent the washer from starting or completing cycles; inspecting and potentially replacing the switch is necessary․ Water temperature issues can arise from a faulty thermostat or heating element․
Finally, clogged lint filters (indicated by error code 353) reduce efficiency and can cause drainage problems․ Regular cleaning of the filter is crucial․ Utilizing the diagnostic mode, as outlined in the manual, can further pinpoint the source of these common malfunctions․
Accessing GE Washer Diagnostic Mode
GE washing machines possess a hidden diagnostic mode, a powerful tool for troubleshooting a wide range of issues․ While the exact procedure varies slightly depending on the model, a common method involves pressing a specific sequence of buttons on the control panel․ Typically, this includes pressing the ‘Spin’ and ‘Rinse’ buttons simultaneously while powering on the machine․
Once activated, the diagnostic mode displays error codes on the washer’s screen, providing valuable insights into the source of the problem․ These codes correspond to specific malfunctions, such as fill issues (E1), drain problems (E2), or unbalanced loads (E3)․ The manual provides a comprehensive list of these codes and their meanings․
Navigating through the diagnostic menu often involves using the ‘Start/Pause’ or other control buttons to scroll through different tests and data points; This mode allows technicians and even informed users to identify failing components and streamline the repair process, saving time and potentially costly service calls․
Error Code E1: Fill Problems
An Error Code E1 on your GE washing machine signals a problem with the filling process․ The washer is unable to adequately fill with water, preventing the wash cycle from starting correctly․ Several factors can contribute to this issue, requiring systematic troubleshooting․
First, verify the water supply valves are fully open and that the hoses aren’t kinked or blocked․ Check for sufficient water pressure; low pressure can trigger an E1 error․ Next, inspect the water inlet valve itself․ This valve controls water flow into the machine and may be faulty, requiring replacement․
The pressure sensor, responsible for detecting water levels, could also be malfunctioning, sending incorrect signals to the control board․ A clogged or damaged water inlet screen can restrict water flow․ Finally, a problem with the main control board itself could be the root cause, though this is less common․ Always disconnect power before inspecting internal components․
Error Code E2: Drain Problems
The GE washing machine Error Code E2 indicates the washer is unable to drain water effectively․ This prevents the machine from proceeding to subsequent cycles, leaving clothes soaked; Troubleshooting requires checking several components involved in the draining process․
Begin by inspecting the drain hose for kinks, clogs, or obstructions․ Ensure the hose isn’t inserted too far into the drainpipe, which can cause siphoning․ Next, examine the drain pump filter for debris like lint, coins, or small objects․ A clogged filter is a frequent cause of E2 errors․
The drain pump itself may be faulty, failing to operate correctly․ Listen for humming sounds during the drain cycle; silence could indicate a pump failure․ A blocked drain pump impeller can also hinder drainage․ Finally, a malfunctioning pressure sensor or a problem with the main control board could be responsible․ Remember to disconnect power before any internal inspection․
Error Code E3: Unbalanced Load
The GE washing machine Error Code E3 signals an unbalanced load during the spin cycle․ This safety feature halts operation to prevent excessive vibration and potential damage to the machine․ An uneven distribution of wet clothes causes the drum to wobble violently․
The most common solution is to redistribute the laundry within the drum․ Stop the washer, open the lid, and manually rearrange the items, ensuring a more balanced distribution․ Avoid washing single, heavy items like rugs or blankets alone, as they are prone to causing imbalance․
If the issue persists, check that the washer is level on the floor․ Use a level to verify and adjust the feet as needed․ A worn or damaged suspension rod can also contribute to imbalance․ Inspect these rods for signs of wear and replace if necessary․ Finally, a faulty motor or control board could trigger a false E3 error, requiring professional diagnosis․
Error Code E31: Slow Drain
A GE washing machine displaying Error Code E31 indicates a slow draining issue․ This means the washer is taking an excessively long time to pump out the water after the wash or rinse cycle․ This often stems from a blockage or malfunction within the drain system․
The first step is to check the drain hose for kinks or obstructions․ Ensure it isn’t crushed or bent, restricting water flow․ Next, thoroughly inspect the drain trap or filter – often located at the front of the machine – for debris like lint, coins, or small articles of clothing․ Remove any obstructions found․
If the hose and trap are clear, the drain pump itself may be faulty․ A clogged or failing pump impeller can significantly reduce draining efficiency․ Professional inspection and potential pump replacement may be required․ A partially clogged pump can also cause this error․ Finally, a restricted house drain line could contribute to slow draining․
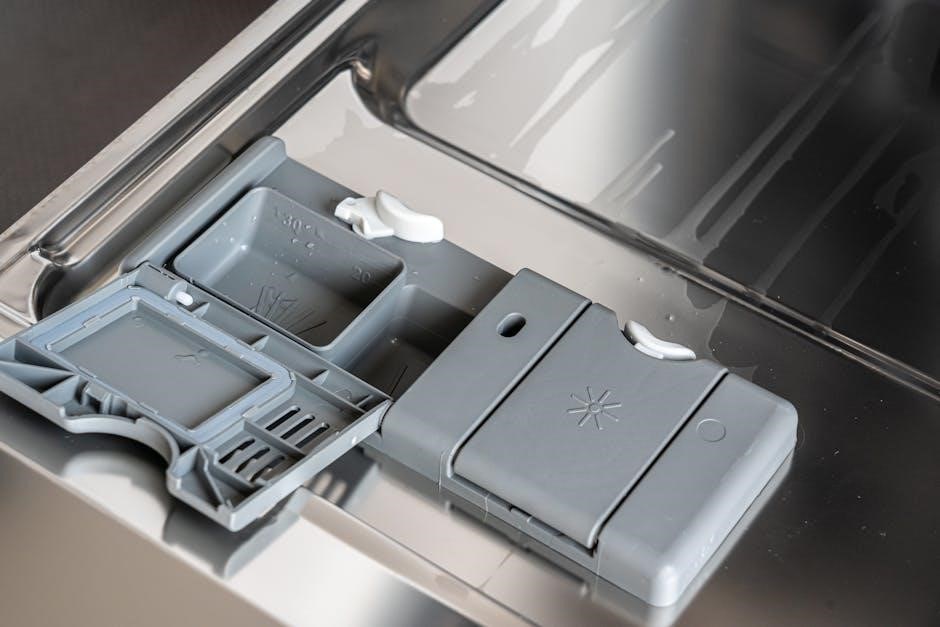
Error Code 353: Lint Filter Clogged
When your GE washing machine displays Error Code 353, it’s a clear signal: the lint filter is clogged․ This is a very common issue, particularly with the buildup of fabric softener residue․ A clogged filter restricts water flow, impacting the washer’s performance and potentially causing drainage problems․
Locating the lint filter is the first step․ It’s typically found inside the washer, often accessible from the front․ Carefully remove the filter – be prepared for some water spillage! Inspect it thoroughly for accumulated lint, fibers, and, crucially, solidified fabric softener․
Clean the filter under running water, using a brush to remove stubborn residue․ Ensure all debris is cleared before reinstalling it securely․ Regularly cleaning the lint filter – ideally after each wash – prevents this error and maintains optimal washer function․ Ignoring this code can lead to more serious issues, so prompt attention is key․
H2O SUPPLY Issues (Front Loaders)
GE front-load washers encountering difficulties filling properly often point to H2O SUPPLY issues․ This doesn’t necessarily mean a complete lack of water; it could be a slow fill or insufficient water levels for effective washing․ Several factors can contribute to this problem, requiring systematic troubleshooting․

First, verify the water supply valves are fully open․ Check both the hot and cold water connections to ensure unrestricted flow․ Next, inspect the inlet hoses for kinks or obstructions that might be limiting water pressure․ A restricted water supply is a frequent culprit․
The pressure sensor or control is another critical component․ If it malfunctions, it might incorrectly signal the washer that sufficient water has entered, prematurely stopping the fill cycle․ Finally, consider the water inlet valve itself; it could be faulty and unable to open fully․ Addressing these potential causes will restore proper water supply to your GE front-loader․
Troubleshooting the Drain Pump
When a GE washing machine fails to drain, the drain pump is a prime suspect․ A common error code associated with this issue is E2 or E31, indicating a drain problem or slow draining․ Initial troubleshooting involves checking for obstructions within the pump itself․

Begin by disconnecting power to the washer and locating the drain pump – typically accessible from the front or rear of the machine․ Carefully inspect the pump housing for any foreign objects like lint, coins, or small articles of clothing․ These can easily block the impeller, preventing proper water expulsion․
If the pump appears clear, use a multimeter to test its electrical continuity․ A lack of continuity suggests a faulty pump requiring replacement․ Remember that the control board may not send a signal if it doesn’t receive an electric signal from the drain pump․ A clogged pump can also cause this issue․
Checking the Water Inlet Valve
If your GE washer isn’t filling with water, or is filling slowly, the water inlet valve is a key component to inspect․ This valve controls the flow of hot and cold water into the machine․ An error code E1 often signals a fill problem, potentially stemming from a faulty valve․
First, disconnect the power supply to the washer․ Locate the inlet valve – usually found at the back of the machine where the water hoses connect․ Check the screens on the inlet valve connections for sediment or debris that could be restricting water flow․ Clean these screens thoroughly․
Next, use a multimeter to test the valve’s solenoid coils for continuity․ If there’s no continuity, the valve needs replacing․ Also, verify that the valve is receiving the correct voltage from the control board when the washer is in the fill cycle․ A lack of voltage indicates a potential control board issue, not necessarily a faulty valve․
Inspecting the Pressure Sensor/Control
The pressure sensor, or pressure switch, is crucial for determining the water level inside your GE washing machine․ Issues with this component can lead to overfilling, underfilling, or even a failure to start a cycle․ For front-load washers, H2O SUPPLY problems often relate to pressure sensor inaccuracies․
Locate the pressure sensor – typically found near the top of the washer cabinet, connected to a small hose․ Disconnect the hose and gently blow into it; you should hear a clicking sound indicating the switch is functioning․ If not, the sensor may be faulty․
Visually inspect the hose for cracks or blockages․ A blocked hose prevents accurate pressure readings․ Use a multimeter to test the sensor’s electrical continuity according to the manufacturer’s specifications․ If the readings are outside the acceptable range, replacement is necessary․ Remember to disconnect power before any inspection or repair․
Diagnosing and Replacing the Motor
A failing motor is a serious issue, often presenting as a washer that won’t agitate or spin․ Before assuming motor failure, check for simpler problems like a faulty lid switch or a jammed pump․ However, if those are ruled out, the motor becomes the prime suspect․
Diagnosing involves checking for continuity using a multimeter․ Disconnect the power and access the motor terminals․ A lack of continuity indicates a broken winding․ Listen for unusual noises during operation – humming, grinding, or clicking can signal internal damage․
Replacing the motor requires disconnecting the wiring harness, removing the belt (if applicable), and unbolting the old motor․ Ensure the new motor is the correct replacement for your GE model․ Reassemble in reverse order, carefully reconnecting all wires and the belt․ Always test the washer after replacement to confirm proper function․

Identifying and Fixing Lid Switch Problems
A malfunctioning lid switch is a common cause of a GE washer failing to start or stopping mid-cycle․ This safety feature prevents operation when the lid is open, protecting users from moving parts․ Identifying a faulty switch often begins with observing whether the washer doesn’t initiate a cycle when the lid is closed․
Identifying the issue involves visually inspecting the switch for damage and testing its continuity with a multimeter․ Disconnect power before testing! The switch should show continuity when the lid is engaged and closed․ A lack of continuity indicates a faulty switch․
Fixing typically means replacing the switch․ Access usually requires removing the control panel or top of the washer․ Disconnect the wiring harness, remove the old switch, and install the new one, ensuring a secure connection․ Reassemble and test the washer to verify the repair․ A properly functioning lid switch is crucial for safe operation․
Addressing Water Temperature Issues
GE washing machines sometimes experience issues with water temperature, resulting in water that’s too cold, too hot, or inconsistent․ This can affect cleaning performance and potentially damage fabrics․ Several factors can contribute to these problems, ranging from simple settings errors to more complex component failures․
Troubleshooting begins with verifying the wash cycle selection․ Ensure the correct temperature setting is chosen․ Next, check the hot water supply to the washer; confirm hot water is available at the faucets․ If the supply is adequate, the issue may lie within the washer itself․
Potential causes include a faulty water inlet valve, a malfunctioning thermostat, or a defective temperature sensor․ The inlet valve controls the mix of hot and cold water․ A faulty thermostat may not accurately regulate temperature․ Fixing these issues often requires component replacement, always disconnecting power before any repair work․ Testing components with a multimeter is recommended․
Dealing with Excessive Vibration
GE washing machines, when experiencing excessive vibration, can be disruptive and potentially damaging to both the appliance and surrounding structures․ Several factors contribute to this issue, often stemming from an unbalanced load, improper leveling, or worn components․ Addressing these concerns promptly is crucial for safe and efficient operation․
The first step is to ensure the washer is level․ Use a leveling tool to check all four corners and adjust the feet accordingly․ An unbalanced load is a common culprit; redistribute items within the drum, avoiding overloading․ If the vibration persists, inspect the suspension rods and shock absorbers․
Worn suspension rods or shocks can’t effectively dampen movement․ Replacing these components often resolves the issue․ Additionally, check the tub bearing for wear; a failing bearing can cause significant vibration․ Repairing or replacing the bearing is a more complex task․ Always disconnect power before any inspection or repair work․
Cleaning the Drain Trap
GE washing machine drain traps can accumulate lint, debris, and small objects, leading to slow draining or complete blockages․ Regularly cleaning this trap is a vital preventative maintenance step․ The location of the drain trap varies by model, but it’s typically accessible from the front or rear of the machine․
Before starting, disconnect the washer from the power supply․ Place towels around the area to absorb any spilled water․ Carefully remove the access panel covering the drain trap․ You may encounter some residual water, so have a shallow container ready․ Slowly unscrew the drain trap cover, being prepared for a rush of water and debris․
Thoroughly clean the trap, removing all accumulated lint, coins, buttons, and other obstructions․ Inspect the drain hose for blockages as well․ Reinstall the cleaned trap cover, ensuring a tight seal to prevent leaks․ Replace the access panel and restore power․ A clean drain trap ensures efficient water removal and prevents future issues․
Understanding GE Washer Parts
GE washing machine repair often requires familiarity with key components․ The drain pump, responsible for expelling water, frequently fails, indicated by error codes like E2 or E31․ The water inlet valve controls water flow; issues here manifest as fill problems (E1)․ A malfunctioning pressure sensor/control can disrupt the water level, impacting wash and rinse cycles․
The motor drives the drum, and diagnosing motor problems requires testing for continuity and voltage․ The lid switch ensures operation only when the lid is closed; a faulty switch prevents the washer from starting․ The control board acts as the brain, interpreting signals and controlling functions․ Finally, the suspension rods and dampers minimize vibration during operation․
Understanding the function of each part is crucial for effective troubleshooting․ Replacement parts are widely available online and through appliance repair stores․ Always disconnect power before attempting any repairs and consult your washer’s model-specific diagrams for accurate component identification․
Locating GE Washer Manuals Online
Finding GE washer manuals online is essential for troubleshooting and repair․ The official GE Appliances website (geappliances․com) provides a comprehensive support section where you can search for manuals by model number․ Entering your specific model number ensures you access the correct documentation․
Numerous third-party websites also archive appliance manuals․ ManualsLib and AppliancePartsPros are popular resources offering downloadable PDFs․ These sites often have manuals for older or discontinued models that may not be readily available on the GE website․ When using third-party sites, verify the manual’s accuracy by comparing the model number and features․
Many online forums and communities dedicated to appliance repair also share links to manuals and troubleshooting guides․ Searching online using keywords like “GE washer model [your model number] manual” will yield relevant results․ Having the manual readily available streamlines the diagnostic process and facilitates successful repairs․
GE Top-Load Washer Error Codes Overview
GE top-load washers utilize error codes to signal malfunctions, aiding in diagnosis․ A common code, E1, indicates a fill problem – the washer isn’t receiving sufficient water․ E2 signifies a drain issue, preventing water removal․ The E3 code points to an unbalanced load, triggering the washer to halt operation to prevent damage․
More specific codes, like E31, denote a slow drain, often caused by a clogged drain pump or obstructed drain hose․ Code 353 frequently signals a clogged lint filter, restricting water flow․ These codes aren’t merely random; they’re diagnostic tools․
Understanding these codes, coupled with the owner’s manual, empowers users to address minor issues independently․ However, complex errors or those involving internal components necessitate professional service․ Always disconnect the power before attempting any repairs․ Referencing the manual alongside the error code provides targeted troubleshooting steps for efficient resolution․
GE Front-Load Washer Error Codes Overview
GE front-load washers employ error codes to communicate operational issues, streamlining the troubleshooting process․ H2O SUPPLY errors, prevalent in front-load models, indicate problems with water intake – either restricted supply or a faulty pressure sensor․ These sensors are crucial for proper filling․
Drain-related errors, similar to top-load models, manifest as codes indicating slow draining or complete drain failure․ A clogged drain pump is a frequent culprit․ Internal error codes, not publicly documented, often require specialized diagnostic tools for interpretation․
The diagnostic mode, a hidden feature in many GE washers, can reveal more detailed error information․ However, accessing and interpreting this data requires technical expertise․ Always prioritize safety by disconnecting power before any inspection․ Consulting the official GE manual, alongside the displayed error code, is the first step towards effective repair․
Preventative Maintenance for GE Washers
Regular preventative maintenance significantly reduces the likelihood of encountering frustrating GE washer error codes․ A primary focus should be the lint filter – a clogged filter (indicated by error code 353) restricts water flow and impacts performance․ Clean it routinely to prevent residue buildup․
Inspect the drain pump periodically for obstructions like small objects or fabric pieces․ Check water inlet hoses for kinks or leaks, ensuring unrestricted water supply․ Run a washer cleaner cycle monthly to eliminate detergent residue and mildew, maintaining optimal cleanliness․
Furthermore, avoid overloading the washer, as this contributes to unbalanced loads (error E3) and stresses the motor․ Level the washer properly to minimize vibration․ Following these simple steps proactively addresses potential issues, extending the lifespan of your GE washing machine and minimizing repair needs․
Where to Find Professional Repair Services
Despite diligent troubleshooting using GE washer manuals and addressing error codes like E1, E2, or E31, some issues necessitate professional intervention․ For complex repairs – such as diagnosing motor problems or intricate pressure sensor failures – a qualified technician is crucial․
GE’s official website provides a locator tool to find authorized service providers in your area․ Alternatively, reputable appliance repair companies offer skilled technicians experienced with GE washing machines․ Online platforms connect you with local repair services, often featuring customer reviews for informed decision-making․
When selecting a service, verify their licensing and insurance․ Obtain a clear estimate before authorizing any work, detailing parts and labor costs․ Remember to inquire about warranties on repairs․ Prioritizing qualified professionals ensures accurate diagnosis and effective resolution of your GE washer’s problems, restoring its functionality safely and efficiently․