
Mantel Mount Instructions: A Comprehensive Guide (Updated 12/18/2025)
MantelMount elegantly solves the problem of mounting TVs above fireplaces since 2014, offering innovative solutions for homeowners. This comprehensive
guide, updated today – 12/18/2025 – provides step-by-step
instructions, installation tips, and troubleshooting advice for a seamless experience.
Refer to the official website for downloadable manuals and helpful installation videos.
Understanding Mantel Mounts
MantelMounts represent a significant advancement in television mounting technology, specifically designed to address the challenges presented by fireplaces. Traditional fixed mounts often position TVs too high, causing uncomfortable viewing angles and neck strain. MantelMount solves this by allowing the TV to be retracted closer to the viewer and swiveled for optimal positioning.
These mounts are engineered to accommodate various TV sizes and weights, ensuring compatibility with a wide range of home entertainment setups. The innovative design incorporates both motorized and manual options, catering to different preferences and budgets. Proper installation is crucial for safety and functionality, and resources like the MantelMount Install Calculator can help determine suitability for your space. Understanding the specific model – MM860 or MM340 – is key to a successful installation, as instructions vary.
What is a Mantel Mount?
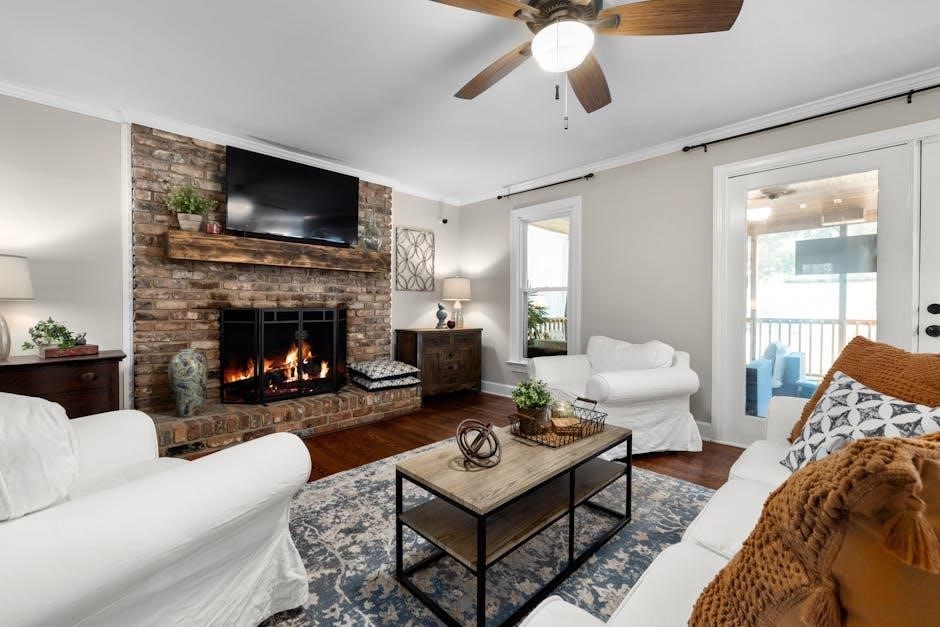
A Mantel Mount is a specialized television mounting system designed to allow for a TV to be positioned above a fireplace, yet still provide a comfortable viewing experience. Unlike standard fixed mounts, MantelMounts extend downwards and can swivel, bringing the television closer to eye level. This innovative design eliminates the common issue of having to crane one’s neck to view a screen placed too high on the wall.
Available in both motorized (MM860) and manual (MM340) versions, these mounts offer flexibility to suit different needs and budgets. Installation often involves a wall plate and bracket system, and some models, like the MM860, may utilize a recess box (RB100) for a cleaner look. Detailed installation manuals and videos are readily available on the official MantelMount website.
Benefits of Using a Mantel Mount
Utilizing a Mantel Mount offers several key advantages over traditional TV mounting methods, particularly when dealing with fireplaces. The primary benefit is improved viewing comfort; the ability to extend and swivel the TV eliminates neck strain associated with high-mounted screens. This creates a more enjoyable entertainment experience for everyone in the room.
Furthermore, MantelMounts enhance the aesthetic appeal of a living space. They allow for a beautifully framed fireplace, showcasing it as a stunning focal point, while still enjoying your television. Installation tips and videos readily available ensure a professional-looking result. Safety is also a benefit, as the mount securely holds the TV, preventing accidental falls, and the spring mechanism is designed to prevent slamming.
Mantel Mount Models: An Overview
MantelMount currently offers two primary models catering to different needs and budgets: the MM860 Motorized Mount and the MM340 Manual Mount. The MM860 is a premium option featuring automated extension and retraction via a remote control, alongside a recess box installation option (RB100) for a cleaner look. It’s ideal for those seeking convenience and a streamlined aesthetic.
Conversely, the MM340 provides a cost-effective solution with manual extension and retraction. While requiring a bit more physical effort, it delivers the same core benefits of improved viewing angles and fireplace showcasing. Both models are designed for compatibility with various TV sizes and wall types, but verifying dimensions with the MantelMount Install Calculator is crucial before purchase.
MM860 Motorized Mount

The MM860 Motorized Mount distinguishes itself with automated extension and retraction, controlled conveniently via a remote. Successful installation necessitates careful wiring and power supply connection, adhering strictly to the comprehensive installation manual available on the MantelMount website. The optional RB100 Recess Box allows for a flush wall mount, concealing wiring for a polished appearance.
Remote control operation is intuitive, offering precise positioning. Remember to avoid letting children operate the mount unsupervised, as forceful upward movement can damage the mechanism. Detailed installation videos and tutorials demonstrate the process, while the MantelMount Install Calculator ensures compatibility with your TV and wall.
MM340 Manual Mount
The MM340 Manual Mount provides a robust and reliable solution for bringing your television closer to eye level above a fireplace. Unlike its motorized counterpart, the MM340 relies on manual extension and retraction, offering a cost-effective alternative. A step-by-step guide detailing the installation process is readily available, showcasing each stage from wall plate mounting to bracket attachment.
Proper installation requires careful attention to detail, ensuring secure attachment to wood or masonry walls. Numerous online resources, including installation videos, demonstrate best practices. Remember to verify compatibility using the MantelMount Install Calculator before beginning. This model, like all MantelMount products, aims to eliminate neck strain and enhance viewing pleasure.

Pre-Installation Considerations
Before installing your MantelMount, assess wall type compatibility, TV size/weight limits, and gather necessary tools. Safety is paramount during installation!
Wall Type Compatibility
MantelMount installations require careful consideration of your wall’s construction. Successful mounting hinges on securing the wall plate to structurally sound surfaces. Brick/Stone Walls generally offer excellent support, but professional assessment is crucial to ensure proper anchoring and avoid damaging the masonry. Specialized drill bits are essential for penetrating these materials.
Wood Stud Walls present a different challenge. Locating wall studs is paramount; the mount must be anchored directly into studs, not just drywall. Using a stud finder is highly recommended. Ensure the studs are adequately sized to bear the weight of the TV and mount. Reinforcement may be necessary if studs are spaced too far apart or are insufficient in strength. Always consult the MantelMount Install Calculator to verify compatibility.
Incorrect wall anchoring can lead to instability and potential safety hazards.
Brick/Stone Walls
Installing a MantelMount on brick or stone requires specialized techniques and tools. These surfaces offer robust support, but proper preparation is vital. Begin by carefully assessing the wall’s condition, checking for cracks or loose mortar. Utilize masonry drill bits specifically designed for the type of brick or stone you’re working with – concrete, brick, or natural stone each require a different bit.
Drill pilot holes slightly smaller than the anchor diameter, ensuring a secure fit. Dust removal from the holes is crucial for optimal anchor adhesion. Employ high-quality masonry anchors rated for the combined weight of the TV and MantelMount. Follow the anchor manufacturer’s instructions meticulously.
Professional installation is strongly recommended if you lack experience with masonry work, to avoid damaging the wall or compromising safety.
Wood Stud Walls
When mounting a MantelMount to wood stud walls, locating the studs is paramount for a secure installation. Use a stud finder to accurately identify the studs’ positions, verifying with small nails if necessary. Avoid mounting directly to drywall, as it lacks the necessary strength to support the TV and mount’s weight.
Ensure the chosen lag bolts are appropriately sized for the studs and the mount’s specifications. Pre-drilling pilot holes slightly smaller than the bolt diameter prevents wood splitting and facilitates easier installation.
Always use washers with the lag bolts to distribute the pressure and enhance stability. Confirm that at least two studs are utilized for mounting the wall plate, providing maximum support and minimizing movement. Professional assistance is advised if stud location proves challenging.
TV Size and Weight Limits
MantelMount models accommodate a range of TV sizes and weights, but adhering to these limits is crucial for safety and optimal performance. Exceeding the specified weight capacity can lead to mount failure, potentially damaging the TV or causing injury.
Generally, MantelMount supports TVs ranging from approximately 37 inches to 82 inches, with weight limits typically between 75 and 150 pounds, varying by specific model (MM860, MM340). Always consult the installation manual for your particular MantelMount to confirm the exact specifications.
Before installation, verify your TV’s weight (including any attached accessories) and screen size. If your TV falls outside the recommended parameters, consider an alternative mounting solution. Using the MantelMount Install Calculator can help confirm compatibility.
Tools Required for Installation
Successful MantelMount installation requires specific tools to ensure a secure and stable setup. A power drill with various drill bits (for pilot holes and lag bolts) is essential, alongside a stud finder to accurately locate wall studs for secure mounting.
A level is critical for ensuring the mount and TV are perfectly horizontal. A socket wrench set, specifically with sizes appropriate for the included lag bolts, is also necessary. A Phillips head screwdriver will be needed for various bracket attachments.
Measuring tape, a pencil for marking locations, and safety glasses are highly recommended. Depending on the wall type, you might also need a hammer drill for brick or stone. Refer to the MantelMount installation manual for a complete, model-specific list.
Safety Precautions
Prioritizing safety during MantelMount installation is paramount. Always disconnect the TV from the power outlet before beginning any work. Ensure the wall can support the combined weight of the TV and mount; consult a professional if unsure.
Wear safety glasses to protect your eyes from debris during drilling. Never over-tighten lag bolts, as this can damage the wall or mount. Avoid letting children interact with the mount during installation or operation – specifically, prevent them from pushing the mount upwards, which could cause it to slam against the wall.
If installing with an RB100 Recess Box, follow the specific instructions carefully. Always double-check all connections before powering on the TV. Refer to the installation manual for comprehensive safety warnings.
Installation Steps: General Guide
The general installation involves mounting the wall plate securely, attaching the bracket to your TV, connecting them, and thoroughly testing the mount’s functionality for smooth operation.
Step 1: Mounting the Wall Plate
Begin by carefully locating wall studs using a stud finder to ensure secure attachment. For brick or stone walls, professional installation is highly recommended, requiring specialized drilling techniques and anchors. Mark the desired height and position of the wall plate, ensuring it aligns with your fireplace mantel and TV specifications.
Use the provided level to guarantee a perfectly horizontal installation. Drill pilot holes into the studs, then securely fasten the wall plate using the appropriate lag bolts. Double-check the plate’s stability by applying firm pressure. If installing with a recess box (RB100), follow the separate instructions for proper integration. Confirm the wall plate is flush against the wall before proceeding to the next step, as a solid foundation is crucial for the entire mounting process.

Step 2: Attaching the Bracket to the TV
Identify the VESA mounting pattern on the back of your television – this is crucial for bracket compatibility. Select the correct screws from the provided hardware kit, ensuring they are the appropriate length and diameter for your TV. Carefully align the bracket with the VESA holes, and gently hand-tighten the screws initially.
Avoid over-tightening, as this could damage the TV’s casing. Once all screws are in place, firmly tighten them using a screwdriver, ensuring the bracket is securely attached. Double-check the bracket’s stability by gently tugging on it. Ensure all cables have sufficient slack to accommodate the TV’s movement when mounted. This step is vital for a safe and reliable installation.
Step 3: Connecting the Bracket to the Wall Plate
Carefully lift the TV, with the attached bracket, and align it with the wall plate. Engage the locking mechanism – this is a critical safety feature, ensuring the TV remains securely attached. Gently lower the TV onto the wall plate, verifying a snug and stable connection. Listen for a distinct click, confirming the locking mechanism has engaged correctly.
Avoid forcing the connection; if resistance is felt, re-align the bracket and wall plate. Double-check the locking mechanism to ensure it’s fully engaged before releasing the TV. Test the connection with a gentle pull to confirm its security. This step requires precision and attention to detail for a safe installation.
Step 4: Testing the Mount’s Functionality
After securely connecting the bracket to the wall plate, thoroughly test the mount’s range of motion. Gently extend and retract the mount, observing smooth and consistent movement. Verify the swivel function operates correctly, allowing for optimal viewing angles. Check for any wobbling or instability during operation; address any issues immediately.
For motorized mounts, test the remote control functionality, ensuring all buttons respond as expected; Avoid letting children operate the mount or push it forcefully to the top position, as this could damage the mechanism. Confirm the mount doesn’t slam against the wall during extension or retraction.

Specific Instructions: MM860 Motorized Mount
The MM860 requires careful wiring and a dedicated power supply for operation. Download the comprehensive installation manual from MantelMount.com for detailed guidance and safety warnings.
Wiring and Power Supply
Proper wiring is crucial for the safe and effective operation of the MM860 motorized mount. Begin by carefully reviewing the wiring diagram included in the comprehensive installation manual, available as a downloadable PDF at www.MantelMount.com. Ensure the power supply is compatible with your local voltage standards before connecting it.
The mount requires a dedicated power outlet; avoid using extension cords or power strips. Connect the power cable securely to the mount’s designated power input, and then plug it into the wall outlet. Double-check all connections to prevent electrical hazards. If installing with the RB100 Recess Box, ensure the wiring is neatly routed within the recess to maintain a clean appearance and prevent interference with the mount’s movement. Always disconnect power before performing any wiring adjustments or inspections.
Remote Control Operation
The MM860’s remote control offers convenient operation of the motorized functions. Before use, ensure the remote has fresh batteries installed. The primary functions include extending and retracting the mount, as well as swiveling the TV to achieve the optimal viewing angle. Familiarize yourself with each button’s purpose, referencing the installation manual for detailed explanations.
To extend or retract the mount, simply press the corresponding arrow buttons on the remote. The swivel function allows for adjustments up to 90 degrees. If the remote malfunctions, first check the batteries and ensure there are no obstructions between the remote and the mount’s receiver. Avoid letting children operate the remote or push the mount to its limits, as this could cause damage.

Recess Box Installation (RB100)

The RB100 Recess Box provides a streamlined appearance by concealing the mount’s mechanism within the wall. Installation requires careful planning and adherence to the provided instructions. Begin by marking the desired location, ensuring sufficient space behind the wall for the recess box and mount’s full range of motion. Cut the opening according to the RB100’s specifications, and securely fasten the box to the wall studs.
When installing with the RB100, pay close attention to the bottom of the recess box. Proper installation is crucial for smooth operation and to prevent damage to the wall or mount. Refer to the installation manual for detailed diagrams and guidance. Ensure all wiring is neatly routed and secured before completing the installation.
Troubleshooting Common Issues
Common problems include a mount that doesn’t extend smoothly, instability, or remote control malfunctions. Always check wiring, power supply, and ensure proper installation first.

Mount Not Extending/Retracting Smoothly
If your MantelMount isn’t moving as expected, several factors could be at play. First, carefully inspect the wiring and power supply to the motorized mount (MM860). Ensure all connections are secure and the unit is receiving adequate power. A loose connection can significantly impede smooth operation.
Secondly, be mindful of the spring force. Do not allow children to push the mount upwards, as this can cause it to slam against the wall, potentially damaging the mechanism. The springs are designed for controlled, motorized movement.
Finally, check for any obstructions along the mount’s travel path. Ensure nothing is blocking its extension or retraction. If the issue persists, consult the official MantelMount website for detailed troubleshooting guides and videos, or contact their support team for assistance.
Mount is Unstable
An unstable MantelMount poses a safety risk and requires immediate attention. The primary cause is often improper installation, particularly regarding wall type compatibility. Verify that the wall plate is securely anchored to either brick/stone or wood stud walls using appropriate hardware.
Double-check that you’ve adhered to the TV size and weight limits specified for your particular MantelMount model (MM860 or MM340). Exceeding these limits compromises stability. Ensure the bracket is firmly attached to the TV itself.
If instability continues, re-examine the connection between the bracket and the wall plate. Tighten all bolts and screws. Utilize the MantelMount Install Calculator to confirm your setup meets the required specifications. If concerns remain, seek professional installation assistance.
Remote Control Malfunctions
If your MantelMount MM860’s remote control isn’t functioning, begin by checking the batteries. Replace them with fresh ones, ensuring correct polarity. Next, verify the wiring and power supply to the mount itself; a loose connection can disrupt remote operation.
Ensure there are no obstructions between the remote and the mount’s receiver. Interference from other electronic devices can also cause issues. Try re-pairing the remote with the mount, consulting the official installation manual for specific instructions.
If problems persist, consult the MantelMount website for troubleshooting guides and FAQs. Consider resetting the mount to its factory settings as a last resort. For continued malfunctions, contact MantelMount support for assistance.
Resources and Support

For comprehensive assistance, visit the official MantelMount website for installation manuals, videos, and the helpful Install Calculator. Contact support for further guidance!
Official Mantel Mount Website & Installation Manuals
Accessing the official MantelMount website, www.MantelMount.com, is your primary resource for detailed product information and crucial installation documentation. The site hosts downloadable PDF versions of all installation manuals, including the comprehensive guide for the MM860 motorized mount. These PDF manuals offer larger, zoomable images, facilitating a clearer understanding of each step.
Beyond the manuals, the website provides a wealth of supplementary materials. You’ll find installation tips and videos designed to streamline the process and ensure a secure, professional result. Regularly updated, the site reflects the latest product revisions and best practices. The downloadable manuals are essential for a successful installation, offering detailed diagrams and safety warnings.
Always prioritize referencing the official documentation to guarantee compatibility and adherence to safety guidelines. Utilizing these resources will empower you to confidently complete your MantelMount installation.
Installation Videos and Tutorials
Visual learners will benefit greatly from the extensive library of installation videos and tutorials available online. A step-by-step guide for the MantelMount 340 manual mount is readily accessible, demonstrating the full installation process from start to finish. These videos, like those from Xpress Tv Mounting, provide a practical, real-world perspective on the installation procedure.
SugaReys offers time-saving tips worth watching before you begin, potentially saving you valuable time and effort. These tutorials often highlight common pitfalls and demonstrate effective techniques for overcoming challenges. They complement the written manuals, offering a dynamic and engaging learning experience.
Utilizing these video resources alongside the official installation manual ensures a thorough understanding of the process, leading to a safer and more successful installation.
Mantel Mount Install Calculator
Before embarking on your MantelMount installation, utilizing the official MantelMount Install Calculator is a crucial first step. This user-friendly tool quickly and easily verifies whether your television’s size and weight are compatible with the mount, and more importantly, if your designated wall space can accommodate the unit safely and effectively.
The calculator considers key factors, preventing potential issues before they arise. It ensures you’ve selected the appropriate MantelMount model for your specific TV and wall configuration. Avoiding compatibility problems saves time, frustration, and potential damage to your TV or wall.
Access this essential tool on the MantelMount website to guarantee a smooth and successful installation process. It’s a proactive measure for a secure and aesthetically pleasing result.