
Seiki Television Manual: A Comprehensive Guide
Navigating KPN’s services and potential email/connectivity issues highlights the need for a clear Seiki TV manual‚ ensuring users can easily set up and troubleshoot their devices.
Seiki televisions offer a compelling blend of affordability and features‚ aiming to deliver a satisfying home entertainment experience. However‚ like any electronic device‚ understanding its functionalities is crucial for optimal performance. This manual serves as a comprehensive resource‚ guiding you through every aspect of your Seiki TV – from initial setup and connection of external devices‚ mirroring issues seen with KPN’s connectivity‚ to navigating the menu‚ adjusting picture and sound settings‚ and managing channels.
Troubleshooting common problems‚ like those encountered with email synchronization or network access‚ is also covered. We’ll explore factory resets‚ firmware updates‚ and essential safety precautions‚ ensuring a smooth and enjoyable viewing experience. This guide aims to empower you to fully utilize your Seiki television’s capabilities.
Understanding Your Seiki TV Model
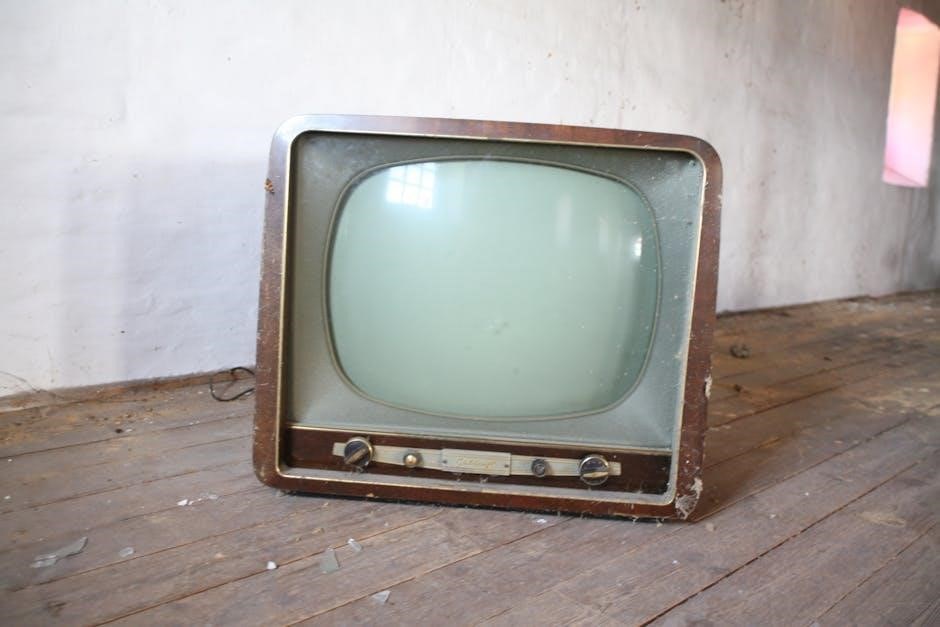
Identifying your specific Seiki TV model is the first step towards unlocking its full potential. Model numbers are typically found on a sticker located on the back of the television‚ often near the power input or serial number. This information is vital for accessing the correct support resources‚ downloading the latest firmware updates – crucial for stability‚ much like resolving KPN connectivity issues – and ensuring compatibility with external devices;
Different models offer varying features‚ such as smart TV capabilities‚ resolution (HD‚ 4K‚ or 8K)‚ and the number of HDMI ports. Knowing these specifications will help you tailor your setup and troubleshoot any potential problems effectively.
Initial Setup and Connections
Begin by unpacking your Seiki TV carefully and placing it on a stable surface; Before connecting any cables‚ ensure the TV is unplugged. Locate the input ports on the rear or side panel – these include HDMI for high-definition devices‚ USB for media playback‚ and potentially component or composite inputs for older devices.

Similar to setting up a KPN internet box‚ a secure connection is key. Connect the power cable last‚ and then power on the TV. Follow the on-screen prompts to select your language‚ region‚ and network settings.

Connecting to Power and Basic Cables
First‚ locate the power input on your Seiki TV – typically a standard three-prong outlet. Ensure the voltage matches your local power supply. Connect the power cord securely. Next‚ connect the antenna or cable TV coaxial cable to the appropriate input.
Just as a stable KPN connection is vital‚ a secure cable connection is crucial for clear reception. If using an older device‚ connect composite (red‚ white‚ yellow) or component (red‚ green‚ blue) cables. Double-check all connections before powering on the TV to prevent potential issues.
Connecting External Devices (HDMI‚ USB‚ etc.)
Locate the HDMI ports on your Seiki TV – these are ideal for connecting Blu-ray players‚ gaming consoles‚ and streaming devices. USB ports allow connection of flash drives or external hard drives for media playback. Remember‚ similar to establishing a KPN internet connection‚ proper connection is key.
For older devices‚ consider using AV inputs. Ensure devices are powered off before connecting. Select the correct input source on your TV using the remote. Properly connected devices will enhance your viewing experience‚ mirroring the reliability of a stable network.
Navigating the Seiki TV Menu
The Seiki TV menu is your central hub for customization. Access it using the ‘Menu’ button on your remote. Similar to managing a KPN account‚ understanding the layout is crucial. Explore sections like ‘Picture’‚ ‘Sound’‚ ‘Channel’‚ and ‘Settings’.
Use the directional buttons to navigate and ‘OK’ to select. Adjust settings to your preference. Remember‚ troubleshooting often begins within the menu. A clear understanding of the menu structure‚ like resolving KPN connectivity issues‚ will improve your viewing experience and overall TV control.
Main Menu Overview
The Seiki TV’s Main Menu presents a user-friendly interface‚ mirroring the organized approach needed for KPN account management. Upon entering‚ you’ll find key categories: Picture‚ Sound‚ Channel‚ Network‚ and System. ‘Picture’ controls visual settings; ‘Sound’ manages audio output. ‘Channel’ handles scanning and programming‚ while ‘Network’ configures internet connectivity.
‘System’ contains advanced options like language and factory reset. Navigating with the remote’s directional pad and ‘OK’ button is intuitive. Familiarize yourself with each section to unlock the full potential of your Seiki TV‚ much like understanding KPN service options.
Picture Settings Adjustment
Optimizing your Seiki TV’s picture quality is straightforward. Within the ‘Picture’ menu‚ adjust Brightness‚ Contrast‚ Color‚ and Sharpness to suit your viewing preferences. Explore advanced settings like Dynamic Backlight and Color Temperature (Warm‚ Cool‚ Normal) for a customized experience. Experiment with Picture Modes – Standard‚ Vivid‚ Cinema‚ and User – to find the ideal setting for different content.
Remember‚ like troubleshooting KPN connectivity‚ small adjustments can make a significant difference. Resetting to ‘Standard’ provides a baseline if you lose track of your changes.
Sound Settings and Audio Options
Seiki TVs offer versatile audio controls. Access the ‘Sound’ menu to adjust Volume‚ Treble‚ and Bass levels. Explore Sound Modes – Standard‚ Music‚ Movie‚ and User – to enhance your listening experience based on content. Like resolving KPN service issues‚ finding the right settings is key.
Consider utilizing the Equalizer for fine-tuned sound customization. If connecting external audio devices‚ ensure the correct input source is selected. Adjusting the Auto Volume Leveling (AVL) can provide a consistent volume across channels.
Channel Management and Programming

Seiki TVs simplify channel organization. Initiate ‘Automatic Channel Scan’ to locate available over-the-air channels. Similar to KPN’s service setup‚ a thorough scan ensures optimal reception. For specific channels not found‚ utilize ‘Manual Channel Tuning‚’ inputting the frequency directly.
The ‘Channel Edit’ function allows renaming‚ deleting‚ and reordering channels for personalized viewing. Create a ‘Favorites’ list for quick access to preferred stations. Regularly rescan channels to maintain an updated program guide‚ mirroring the need for consistent KPN connectivity.
Automatic Channel Scan
The ‘Automatic Channel Scan’ feature swiftly locates all available over-the-air broadcast channels. Access this function within the ‘Channel’ menu of your Seiki TV. The TV systematically searches across all frequencies‚ adding discovered channels to your program list.
Similar to establishing a KPN internet connection‚ this process requires a stable signal. Ensure your antenna is properly connected. The scan duration varies depending on location and signal strength. After completion‚ review the channel list and delete any unwanted channels. Rescanning periodically is recommended for updated channel lineups.
Manual Channel Tuning
‘Manual Channel Tuning’ allows precise channel input when automatic scans fail or for specific channel access. Navigate to the ‘Channel’ menu and select ‘Manual Tuning.’ You’ll need to input the channel number and frequency directly‚ similar to configuring a KPN service manually.
Refer to your local broadcast listings for accurate frequency information. Select the appropriate modulation (e.g.‚ CATV‚ Antenna). Scan for the specified channel. Repeat for each desired channel. This method is useful for weak signals or channels not detected during automatic scans.
Using the Remote Control
Your Seiki remote is the primary interface for controlling your TV. Familiarize yourself with key functions: Power‚ Volume‚ Channel‚ Menu‚ and Input selection. The directional pad navigates menus‚ while ‘OK’ confirms selections. Like managing a KPN account‚ understanding the controls is crucial.
Dedicated buttons provide quick access to settings and smart features. If unresponsive‚ check battery levels first. Ensure a clear line of sight between remote and TV. Refer to the ‘Remote Control Button Functions’ section for detailed explanations of each button’s purpose.
Remote Control Button Functions
The Power button‚ unsurprisingly‚ turns the TV on and off. Volume +/- adjusts the sound level. Channel +/- cycles through available channels. Menu accesses the TV’s settings. Input selects the source (HDMI1‚ USB‚ etc.).
Directional buttons navigate menus‚ similar to navigating a KPN service portal. OK/Enter confirms selections. Back/Return goes to the previous screen. Home accesses smart features. Mute silences the audio. Understanding these functions streamlines your viewing experience‚ avoiding frustration.
Remote Control Troubleshooting
If the remote isn’t working‚ first check the batteries – replace them with fresh ones. Ensure there’s a clear line of sight between the remote and the TV‚ removing any obstructions. Try resetting the remote by removing and reinserting the batteries.
Similar to KPN connectivity issues‚ interference can occur. If problems persist‚ re-pair the remote with the TV (consult the full manual for pairing instructions). A malfunctioning remote can be frustrating; these steps often resolve common issues. Contact Seiki support if problems continue.
Network Connectivity and Smart Features
Connecting your Seiki TV to a network unlocks a world of smart features. Access the network settings in the TV’s menu and select your Wi-Fi network. Enter your password when prompted. Like troubleshooting KPN internet access‚ ensure your router is functioning correctly.
Once connected‚ explore pre-installed apps or download new ones from the app store. Enjoy streaming services‚ browsing the web‚ and more. Regularly check for software updates to maintain optimal performance and security‚ mirroring the importance of updated KPN services.
Connecting to Wi-Fi
To connect your Seiki TV to Wi-Fi‚ navigate to the “Network” or “Internet” settings within the main menu. Select “Wi-Fi Connection” and a list of available networks will appear. Choose your network from the list and enter the password using the on-screen keyboard.
Similar to resolving KPN connectivity issues‚ ensure your router is powered on and broadcasting a signal. If the network doesn’t appear‚ try refreshing the list or manually entering the network name (SSID). A stable Wi-Fi connection is crucial for streaming and smart features.

Using Smart TV Apps
Your Seiki Smart TV offers access to a variety of streaming apps‚ such as Netflix‚ YouTube‚ and more. Access these through the “Apps” or “Smart Hub” section of the main menu. Select an app to launch it‚ and you may need to sign in with your account credentials.
Troubleshooting app issues can mirror KPN service problems; ensure your Wi-Fi connection is stable. If an app isn’t working‚ try restarting it or clearing its cache. Regularly updating apps ensures optimal performance and access to the latest features‚ enhancing your viewing experience.

Troubleshooting Common Issues
Encountering problems with your Seiki TV? Begin with basic checks: ensure the power cable is securely connected and the TV is switched on. Similar to KPN connectivity issues‚ verify your Wi-Fi connection if using smart features. If there’s no picture‚ check the input source and cable connections.
For no sound‚ examine the volume settings and audio output options. Restarting the TV often resolves minor glitches. If problems persist‚ consult the online support resources or consider a factory reset (see section on advanced settings) as a last resort.
No Picture Issues
Experiencing a blank screen on your Seiki TV? First‚ confirm the power cord is firmly plugged into both the TV and a working outlet. Next‚ cycle through the input sources using the remote – ensure the correct source (HDMI 1‚ HDMI 2‚ etc.) is selected. Check the connected cables; a loose or damaged HDMI cable is a common culprit.
Like KPN’s connectivity problems‚ a signal interruption can cause this. Try a different cable or port. If using an external device‚ verify it’s powered on and outputting a signal. Finally‚ a temporary TV restart can often resolve minor display errors.
No Sound Issues
Encountering silence from your Seiki TV? Begin by verifying the volume level isn’t muted or set too low‚ using both the TV remote and the physical buttons. Similar to KPN’s service disruptions‚ a connection problem could be the cause. Check the audio output settings in the TV’s menu – ensure the correct output (TV speakers‚ HDMI ARC‚ optical) is selected.
If using external speakers‚ confirm they are powered on and properly connected. Try a different audio cable or port. A TV restart can sometimes resolve software glitches affecting audio output. Finally‚ test with a different source to isolate the issue.
Factory Reset and Advanced Settings
Considering a factory reset? This restores your Seiki TV to its original settings‚ resolving persistent software issues – akin to resetting a KPN internet box to resolve connectivity problems. Access this option through the TV’s menu‚ typically under ‘System’ or ‘Settings’. Be warned: all personalized settings will be erased.
Advanced settings offer granular control over picture and sound‚ network configurations‚ and accessibility features. Exercise caution when modifying these‚ as incorrect adjustments can impact performance. Consult the full manual for detailed explanations of each advanced option.
Performing a Factory Reset
Initiating a factory reset on your Seiki TV is a powerful troubleshooting step‚ similar to resolving KPN service issues by resetting your modem. Navigate to the ‘Settings’ menu‚ then ‘System’‚ and select ‘Reset’ or ‘Factory Reset’. Confirm your decision‚ as this process will erase all personal data‚ channel settings‚ and account logins.
The TV will power cycle during the reset. Do not interrupt this process. Once completed‚ you’ll be guided through the initial setup‚ as if the TV were brand new. This is useful for resolving software glitches or preparing the TV for resale.
Accessing Advanced Menu Options
Unlocking the advanced settings on your Seiki TV allows for fine-tuning beyond standard picture and sound controls‚ much like accessing detailed KPN account settings. Typically‚ these options are hidden within the ‘System’ or ‘Advanced Settings’ submenu. Access may require a PIN‚ often ‘0000’ or ‘1234’ by default – check your manual for the correct code.
Here‚ you can adjust settings like HDMI input modes‚ software update preferences‚ and network configurations. Exercise caution when modifying these settings‚ as incorrect adjustments can impact TV performance. Refer to the manual for detailed explanations of each option.
Understanding TV Inputs and Outputs
Seiki TVs offer a variety of ports for connecting external devices‚ similar to the multiple connection options needed for KPN’s internet box and TV services. HDMI inputs are primary for high-definition sources like Blu-ray players and gaming consoles. USB ports allow for media playback from flash drives or external hard drives.
Component and composite inputs support older devices‚ while the optical audio output connects to soundbars or receivers. Understanding these connections ensures optimal signal transmission and audio quality. Refer to your TV’s manual for specific port locations and capabilities.
Seiki TV Firmware Updates
Regular firmware updates are crucial for maintaining optimal Seiki TV performance‚ much like ensuring a stable connection with a service provider like KPN. These updates often include bug fixes‚ improved compatibility‚ and new features. Checking for updates is typically done through the TV’s settings menu‚ under a ‘System’ or ‘Support’ section.
Manual updates may be available via USB if network connectivity is unstable. Always follow the on-screen instructions carefully during the update process to avoid interrupting it‚ which could potentially damage the TV’s software.
Checking for Updates
To check for firmware updates on your Seiki TV‚ navigate to the ‘Settings’ menu using your remote. Look for sections labeled ‘System‚’ ‘Support‚’ or ‘About.’ Within these‚ you should find an option like ‘Software Update’ or ‘Firmware Update.’ Select this option‚ and the TV will automatically search for available updates.
Similar to troubleshooting KPN connectivity issues‚ this process requires a stable internet connection. If an update is found‚ carefully follow the on-screen prompts to download and install it. The TV may restart during this process – do not interrupt it!
Updating Firmware Manually
In cases where automatic updates fail‚ or you prefer a direct approach‚ manual firmware updates are possible. Visit the official Seiki website and navigate to the ‘Support’ or ‘Downloads’ section. Locate your specific TV model and download the latest firmware file – typically a .zip or similar archive.
Much like resolving KPN email synchronization problems‚ this requires careful attention. Unzip the file and follow the instructions provided by Seiki‚ usually involving a USB drive. Insert the USB drive into your TV and select the update option within the ‘System’ menu.
Safety Precautions and Maintenance
To ensure longevity and safe operation‚ several precautions are essential. Always disconnect the TV from the power outlet before cleaning‚ using a soft‚ dry cloth. Avoid liquids and abrasive cleaners. Ensure adequate ventilation around the TV‚ preventing obstruction of vents – similar to maintaining proper network connectivity like KPN’s fiber optic cables.
Do not attempt to disassemble or repair the TV yourself; this voids the warranty and poses safety risks. Keep the TV away from extreme temperatures and humidity. Regularly check the power cord for damage‚ and replace if necessary.
Warranty Information and Support
Your Seiki television is covered by a limited warranty‚ protecting against manufacturing defects for a specified period from the date of purchase. Retain your proof of purchase for warranty claims‚ similar to keeping records of KPN service requests. The warranty does not cover damage from misuse‚ accidents‚ or unauthorized repairs.
For support‚ visit the official Seiki website for FAQs‚ troubleshooting guides‚ and contact information. You can reach customer support via phone or email. Be prepared to provide your TV model number and purchase date when contacting support.
Frequently Asked Questions (FAQ)
Q: My screen is black‚ but the power light is on? A: Check the input source and ensure it’s correctly selected. Like troubleshooting KPN connectivity‚ verify all cable connections are secure. Q: I forgot my Wi-Fi password? A: Access the network settings in the TV menu to re-enter your credentials.
Q: How do I reset my TV to factory settings? A: Navigate to the advanced settings menu and select the factory reset option. Q: Can I use external speakers? A: Yes‚ utilize the audio output ports (HDMI ARC‚ optical) to connect external sound systems.
Seiki TV Specifications by Model
Seiki offers diverse models‚ each with unique specifications. Like KPN’s varied service packages‚ understanding these details is crucial. Model SE50FY18: 50” screen‚ 4K UHD resolution‚ 3 HDMI ports‚ 1 USB port. Model SE43FY18: 43” screen‚ Full HD‚ 2 HDMI ports‚ 1 USB port.
Model SE65UY19: 65” screen‚ 4K UHD‚ HDR support‚ 4 HDMI ports‚ 2 USB ports‚ Smart TV functionality. Model SE32FY18: 32” screen‚ HD Ready‚ 1 HDMI port‚ 1 USB port. Refer to the specific model number on your TV’s rear panel for accurate details.
